
Article #1:
The Taxidermy Industry: Problems and Fixes
What really spurred my career in taxidermy was my overall dissatisfaction with how taxidermists operated in my area. I’d been blessed with a handful of trophy animals over the years, but each time I went shopping for a good taxidermist I was disappointed. There was a serious lack of professionalism and customer service in this industry. The taxidermy industry was begging for some serious changes, so my goal was push these changes beginning with my own studio.
In this article, I’ve identified key problems with the current taxidermy industry and how to fix them.
Professionalism
Many of the taxidermy shops I’ve visited are filthy, smelly, disgusting bacteria breeding grounds operated out of some guy’s garage or basement. The paperwork and invoices were crude, handwritten forms with no guarantees of quality or turnaround time.
The Fix:
In my studio you can expect a clean and professional work area. Your paperwork is professional with expectations and guarantees clearly spelled out. I understand that your trophy is an invaluable piece of art, and both you and the animal deserve the greatest respect and highest quality craftsmanship possible.
Turnaround Time
In most cases, the turnaround time I was quoted for my “trophy of a lifetime” was six months to a year. This was somewhat understandable considering the time it takes to create a professional-quality mount. However, in every case the taxidermist simply disappeared out of my life immediately after receiving my deposit. Then eight to ten months later I’d start making calls only to learn that the taxidermist hadn’t even started on my mount, or he was “backed up” and blamed the delay on the tannery. Again, the taxidermist would disappear until I made several more calls (mostly unanswered). Apparently this was the industry norm.
The Fix:
In my studio you’ll NEVER wait a year to get your trophy back. I know how important your trophy is. As far as I’m concerned, your trophy--whether a world record buck or your kid's first forked horn--is the only trophy in the world and commands respect, for both you and the animal. I will make every effort to update you periodically on the progress of your mount. At any time you may request photos of your mount’s progress. If for some reason your trophy can’t be completed within eight months, you will receive a 10% refund of your deposit for each month that your mount is delayed. (All of this will be clearly spelled out in your paperwork.)
Quality of Mount
Finally, after a year of anticipation I go to pick up my trophy mount, and either it’s lacking in quality or doesn’t even look like the animal I harvested. This has been my biggest disappointment with the industry. That amazing deer you harvest must look like the specimen it once was, not some generic deer-like rendition.
The Fix:
I will do whatever it takes to recreate your trophy according to your specifications and true to the animal’s life. If for any reason you are not satisfied with the mount, I’ll happiyl fix it for free. I believe that you and your trophy deserve special care and reverence. Again, this will be spelled out in your paperwork.
*************************************************************************
Article #2
Stop-Rot: Saving Your Hide
Stop-Rot: What is it, and why do I need it?
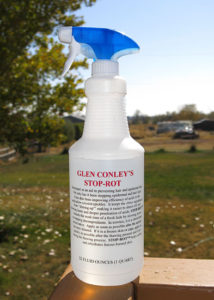
Stop-Rot is an anti-bacterial liquid preservative that “extends the work time of a fresh hide by slowing down or stopping decomposition,” thus saving your trophy hide from decay and hair loss.
Stop-Rot was developed by taxidermist/chemist, Glen Conley, specifically for saving hides from hair slippage ahead of the tanning process. It has been used widely in the taxidermy industry for years, and now hunters are using it too.

After harvesting your animal, bacteria starts to multiply all over it’s body, especially around wet and bloody areas. In a relatively short period of time, bacteria begins to attack the skin and hair follicles, thus leading to hair slippage, and eventually ruined hide.A good taxidermist can fix almost anything, but very little can be done to save a hide with hair falling out.

Because bacteria thrives in warm temperatures, Stop-Rot is especially useful during earlier hunting seasons in August and September. Traditionally salt was used to preserve hides afield. However, salt dries out the hide and makes it virtually impossible to flesh properly before going into the tanning process.
How to Use Stop-Rot
Stop-Rot can be used on both the flesh side of the hide and the hair side. The instructions say to “apply Stop-Rot as soon as possible after the animal has been skinned.” For this reason I always keep a bottle of Stop-Rot back at camp. I’ll spray it on any bloody spots or short-haired areas like the face and ears. I just spray it on and massage it in. Be sure to spray a light coating over the entire flesh side of the hide.


Where Can I Buy Stop-Rot?
Stop-Rot runs about $24.00 a quart and is only available through taxidermy supply companies like Van Dykes or Trufitt. To avoid paying shipping, request a bottle from your taxidermist. Note: If you live it Utah, you can buy Stop-Rot at Trufitt’s physical store at 1744 South Redwood in Salt Lake City.
Conclusion
Stop-Rot should be used when hunting in warm conditions or any time you can’t get your hide to a freezer or taxidermist in a timely manner. Although I’m constantly touting the benefits of Stop-Rot, I don’t receive any sort of commission. My taxidermy business, however, relies on working with usable hides. More importantly is the preservation of your hard-won trophy. Stop-Rot: use it or lose it!
_______________________________________________________________________________________________________
How to Skin a Deer for Mounting:
A quality trophy mount begins with proper field dressing and hide care. Please refer to this informative video for instructions: